Installing Hard Disk
This article describes the hard disk drive installation process, particularly the configuration, physical installation, and formatting of a hard disk drive. To install a hard drive in a PC, you must perform some or all of the following procedures:
-
Configure the drive.
-
Configure the host adapter (if used).
-
Physically install the drive.
-
Configure the system to recognize the drive.
-
Partition the drive (FDISK, DISKPART, or SETUP).
-
High-level format the partitions (FORMAT or SETUP).
As you perform the procedure, you might need to know various details about the hard disk drive, host adapter (if used), and system ROM BIOS, as well as many of the other devices in the system. This information usually appears in the various manuals or reference sheets that come with these devices.
When you purchase these items, be sure the vendor includes any documentation that came with the original components. (Many do not include the manuals unless you ask for them.) For most equipment sold today, you will get enough documentation from the vendor to enable you to proceed.
If you are like me, however, and want all the technical documentation on the device, you should contact the original manufacturer of the device and order the technical specification manual. For example, if you purchase a system that comes with a particular ATA drive, the seller probably will give you some limited information on the drive, but not nearly the amount that the technical manual for the drive provides.
To get this documentation, you normally download it from the drive manufacturer's Web site. The same rule applies for any of the other components in most of the systems sold today. I find the OEM technical manuals essential in providing the highest level of technical support possible.
For reference, you can look up the hard disk manufacturer names in the Vendor List on the DVD-ROM; you will find numbers to call for technical support, as well as URLs for their Web sites.
Drive Configuration
Before you physically install a hard disk drive in the computer, you must ensure that it is properly configured. For an ATA drive, this generally means designating the drive as a master/slave or using the Cable Select (CS) feature and a special cable to determine the relationship. For SCSI drives, you must set the device's SCSI ID and possibly its SCSI bus termination state.
Host Adapter Configuration
Older hard disk drive types used separate disk controller cards you had to install in a bus slot. The ATA, SCSI, and SATA hard disk drives used in today's PCs, however, have the disk controller integrated into the drive assembly. For ATA drives, the I/O interface is nearly always integrated into the system's motherboard, and you configure the interface through the BIOS Setup.
Some systems might use ATA/IDE adapters in lieu of the built-in interface. This is because some of the motherboard-integrated ATA interfaces might not support the faster modes (such as Ultra-ATA/33 through Ultra-ATA/133) that most newer drives can use.
In most cases, I would recommend upgrading the motherboard rather than getting an ATA host adapter because a new motherboard has other benefits and the cost isn't much higher. SATA drives can be connected to a system with a standard ATA interface by installing an SATA adapter card.
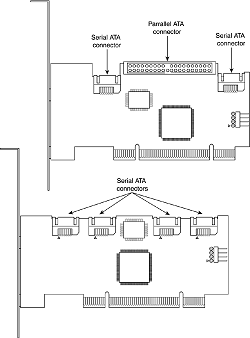
If the system has an SATA host adapter built in to the motherboard, no additional card is necessary. SCSI drives, however, usually require a host adapter card you must install in a bus slot like any other card. A few motherboards have integrated SCSI adapters, but these are rare.
Configuring a SCSI host adapter card involves setting the various system resources the adapter requires. As with most expansion cards, a SCSI host adapter requires some combination of the following system resources:
-
Boot ROM address (optional)
-
Interrupt request (IRQ)
-
Direct Memory Access (DMA) channel
-
I/O port address
Not all adapters use every one of these resources, but some might use them all. In most cases with modern plug-and-play adapters and systems, the BIOS and your operating system automatically configure these resources. The computer sets the required hardware resource settings to values that do not conflict with other devices in the computer.
If your hardware or operating system does not support Plug and Play, you must manually configure the adapter to use the appropriate resources. Some adapters provide software that enables you to reconfigure or change the hardware resources, whereas others might use jumpers or DIP switches on the adapter card.
The ATA interface driver is part of the standard PC BIOS, which enables booting from an ATA drive. Systems that include SATA interfaces on the motherboard also incorporate support for SATA into the BIOS.
The BIOS provides the device driver functionality the system needs to access the drive before any files can be loaded from disk. However, a SCSI interface driver is not part of the standard PC BIOS, so most SCSI host adapters have their own onboard ROM BIOS that enables SCSI drives to function as bootable devices.
Use of the SCSI BIOS is usually optional. If you are not booting from a SCSI drive, you can leave the BIOS on the card disabled and merely install the appropriate device driver to access the SCSI devices. Most host adapters have switches, jumpers, or configuration software you can use to enable or disable SCSI BIOS support.
In addition to providing boot functionality, the SCSI BIOS can provide many other functions, including any or all of the following:
-
Low-level formatting
-
Drive-type (parameter) control
-
Host adapter configuration
-
SCSI diagnostics
-
Support for nonstandard I/O port addresses and interrupts
If the adapter's onboard BIOS is enabled, it uses specific memory address space in the upper memory area (UMA). The UMA is the top 384KB in the first megabyte of system memory.
It is divided into three areas of two 64KB segments each, with the first and last areas being used by the video adapter circuits and the motherboard BIOS, respectively. Segments C000h and D000h are reserved for use by adapter ROMs, such as those found on disk controllers or SCSI host adapters.

