PC Assembly and Disassembly
Actually assembling the system is easy after you have lined up all the components. In fact, you will find the parts procurement phase the most lengthy and trying of the entire experience. Completing the system is basically a matter of screwing everything together, plugging in all the cables and connectors, and configuring everything to operate properly together.
In short order, you will find out whether your system operates as you had planned or whether some incompatibilities exist between some of the components. Be careful and pay attention to how you install all your components. It is rare that a newly assembled system operates perfectly the first time, even for people who are somewhat experienced.
It is very easy to forget a jumper, switch, or cable connection that later causes problems in system operation. Most people's first reaction when problems occur is to blame defective hardware, but that is usually not the source. The problem can typically be traced to some missed step or error made in the assembly process.
Above all, the most crucial rule of assembling your own system is to save every piece of documentation and software that comes with every component in your system. This material can be indispensable in troubleshooting problems you encounter during the assembly process or later. You should also retain all the packing materials used to ship mail-order components to you until you are certain they will not have to be returned.
Assembly Preparation
The process of physically assembling a PC requires only a few basic tools: a 1/4'' nut driver or Phillips-head screwdriver for the external screws that hold the cover in place and a 3/16'' nut driver or Phillips-head screwdriver for all the other screws. Needle-nose pliers can also help in removing motherboard standoffs, jumpers, and stubborn cable connectors.
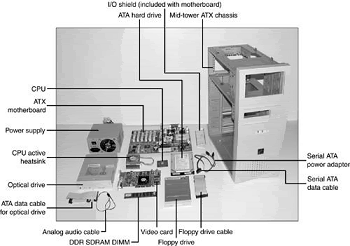
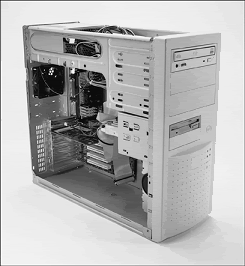
Because of marketplace standardization, only a couple types and sizes of screws (with a few exceptions) are used to hold a system together. Also, the physical arrangement of the major components is similar even among different manufacturers. Figure 1 shows the components that go into a typical system, and Figure 2 shows the system with those components assembled.


Note that the components shown here are for a standard PC. Your final component list might vary. Other tools you'll need are software related. You'll need the master operating system CD-ROM, and if your particular CD-ROM version isn't bootable or your system is older and doesn't support booting from CD, you'll also need an operating system startup floppy disk with CD-ROM drivers installed.
This way, your system will recognize the CD-ROM drive and enable you to install the operating system from it. Newer operating systems often come on bootable CDs, but sometimes only the OEM (and not retail) versions of the OS are configured that way. The Windows 98 and later versions' startup floppies include generic ATAPI and SCSI CD-ROM drivers on them, enabling virtually all CD-ROMs to be recognized after booting from them.
If you are installing Windows 95 or some other operating system that does not include a startup disk with CD-ROM drivers already installed, you can either use a Win98 or later startup disk or take your existing startup disk and install the CD-ROM drivers that came with your drive.
The following is the assembly and disassembly procedure:
-
Case or cover assembly
-
Power supply
-
Adapter boards
-
Motherboard
-
Disk drives
With regard to assembly and disassembly, it is best to consider each system by the type of case it uses. All systems that have AT-type cases, for example, are assembled and disassembled in much the same manner. Tower cases are basically AT-type cases turned sideways, so the same basic instructions apply. Most Slimline and XT-style cases are similar; these systems are assembled and disassembled in much the same way.