Surfing with Internet Explorer
After you’re signed up with an ISP and connected to the Internet, it’s time to get surfing. The World Wide Web is a particular part of the Internet with all sorts of cool content and useful services, and you surf the Web with a piece of software called a web browser.
The most popular web browser today is Microsoft’s Internet Explorer, and you probably have a copy of it already installed on your new PC. This chapter shows you how to use Internet Explorer and then takes you on a quick trip around the Web—just enough to get your online feet wet!
Understanding the Web
Before you can surf the Web, you need to understand a little bit about how it works. Information on the World Wide Web is presented in pages. A web page is similar to a page in a book, made up of text and graphics.
A web page differs from a book page, however, in that it can include other elements, such as audio and video, and links to other web pages. It’s this linking to other web pages that makes the Web such a dynamic way to present information. A link on a web page can point to another web page on the same site or to another site.
Most links are included as part of a web page’s text and are called hypertext links, or just hyperlinks. (If a link is part of a graphic, it’s called a graphic link.) These links are usually in a different color from the rest of the text and often are underlined; when you click a link, you’re taken directly to the linked page.
Web pages reside at a website. A website is nothing more than a collection of web pages (each in its own individual computer file) residing on a host computer. The host computer is connected full-time to the Internet so that you can access the site—and its web pages— anytime you access the Internet.
The main page at a website usually is called a home page, and it often serves as an opening screen that provides a brief overview and menu of everything you can find at that site. The address of a web page is called a URL, which stands for uniform resource locator. Most URLs start with http://, add a www., continue with the name of the site, and end with a .com.
Using Internet Explorer 7
The web browser included in Windows is Internet Explorer (IE). In Windows Vista, the version of IE is Internet Explorer 7. This version is also available for Windows XP, although you may need to upgrade from a previous version to get IE7. Internet Explorer 7 is easy to use. To launch IE, follow these steps:
- Click the Start button to display the Start menu.
- Select Internet Explorer (at the upper-left part of the menu).
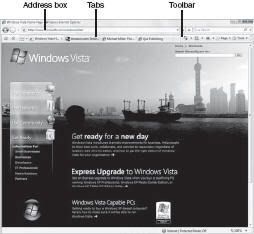
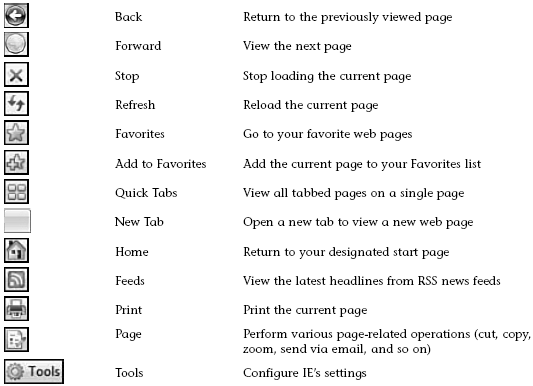
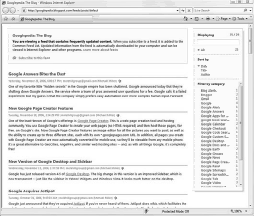
Figure below shows the various parts of the IE program, and tells you what each of the buttons on the toolbar does.
Basic Web Surfing
Internet Explorer enables you to quickly and easily browse the World Wide Web—just by clicking your mouse. Here’s a step-by-step tour of IE’s basic functions:
- When you first launch Internet Explorer, it loads your predefined home page.
- Enter a new web address in the Address box, and press Enter. Internet Explorer loads the new page.
- Click any link on the current web page. Internet Explorer loads the new page.
- To return to the previous page, click the Back button (or press the Backspace key on your keyboard). If you’ve backed up several pages and want to return to the page you were on last, click the Forward button.
- To return to your start page, click the Home button.
Using Tabbed Browsing
In previous versions, Internet Explorer utilized a single-document interface—that is, each browser window could contain only a single web page. IE7, in contrast, has a multidocument interface, with multiple web pages displayed in a single browser window via the use of tabs.
The use of tabs within a single browser window lets you keep multiple web pages open simultaneously. This is great when you want to keep previous pages open for reference or want to run web-based applications in the background. To open a web page on a new tab, just click the next (empty) tab and enter a URL.
You can also choose to open a link within a page in a new tab, by right-clicking the link and selecting Open in New Tab. You switch between tabs by clicking a tab with your mouse or by pressing Ctrl+Tab on your keyboard. You can also reorder your tabs by dragging and dropping them into a new position.
You can view the contents of all open tabs with IE’s Quick Tabs feature. When you click the Quick Tab icon or press Ctrl+Q, all open web pages are displayed as thumbnails in a single window, as shown in Figure 2.
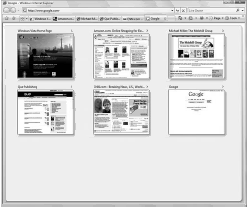
Click any thumbnail to open that tab in the full window.
Advanced Operations
Internet Explorer 7 can do much more than simple browsing. Let’s take a quick look at some of the more advanced operations in Internet Explorer that can make your online life a lot easier.
Searching from the Browser
If you search the Web a lot, and I know you do, you spend a lot of time going to your favorite search site. In Internet Explorer 7 you don’t have to keep going back to that site; you can do all your searching from within the browser window.
That’s because Internet Explorer 7 adds an Instant Search box to the main toolbar, to the right of the Address box. This lets you perform web searches without having to first navigate to a separate search site. To conduct a search from within IE7, just enter your query into the Search box and press the Enter key on your keyboard.
Your query is sent via IE over the Internet to the selected search provider. The search site receives the query, searches its own previously compiled index of web pages, and returns a page of search results, which is displayed in the Internet Explorer window. It’s that easy.
By default, IE routes your search to Microsoft’s Windows Live Search site. If you prefer to use another search engine, such as Google, you can change this default. Just click the down arrow next to the Search box and select Change Search Defaults; when the next dialog box appears, select the search engine you want and click the Set Default button.
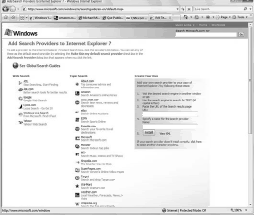
If the search site you want isn’t listed in the Change Search Defaults list, select Find More Providers from the pull-down list, instead. When the Add Search Providers web page appears, as shown in Figure 3, click the search engine you want to use.
You can then return to the Change Search Defaults dialog box to select this new search engine as your default.
Saving Your Favorite Pages
When you find a web page you like, you can add it to a list of Favorites within Internet Explorer. This way you can easily access any of your favorite sites just by selecting them from the list. To add a page to your Favorites list, follow these steps:
- Go to the web page you want to add to your Favorites list.
- Click the Add to Favorites button and select Add to Favorites from the pop-up menu.
- When the Add a Favorite dialog box appears, confirm the page’s name and select the folder where you want to place this link.
- Click OK.
To view a page in your Favorites list, follow these steps:
- Click the Favorites Center button. A new pane appears in the browser window
- Click the Favorites button in this new pane.
- Click any folder in the Favorites pane to display the contents of that folder.
- Click a favorite page, and that page is displayed in the browser window.
Revisiting History
Internet Explorer has three ways of keeping track of web pages you’ve visited, so you can easily revisit them without having to re-enter the web page address. To revisit the last page you visited, click the Back button on the toolbar. You can continue clicking Back to go the last previous page.
To revisit one of the last half-dozen or so pages viewed in your current session, click the down arrow next to the Forward button. This drops down a menu containing the last ten pages you’ve visited.
Highlight any page on this menu to jump directly to that page. To revisit pages you’ve viewed in the past several days, you use IE’s History pane. Just follow these steps:
- Click the Favorites Center button to display the Favorites pane.
- In the new pane, click the History button.
- Click a specific page to display that page in the right pane.
Printing
Printing a web page is easy—just click the Print button. If you want to see a preview of the page before it prints, click the down arrow next to the Print button and select Print Preview.
Viewing RSS News Feeds
Another new feature in Internet Explorer 7 is the capability to view the latest content from blogs, news sites, and other similar web pages. This is done via Real Simple Syndication (RSS), a technology used to syndicate, or distribute, frequently updated content.
Previously, you had to use a separate news reader program to view these RSS news feeds. With Internet Explorer 7, however, you can easily subscribe to and read RSS feeds directly in the web browser.
To subscribe to the feed for a given website, navigate to the site and then click the Feeds button on the Internet Explorer 7 toolbar. This displays an RSS-friendly version of the current page, such as the one shown in Figure 5; click Subscribe to This Feed to add the subscription. This feed is then added to your list of RSS subscriptions.
To view the latest news and headlines from your subscribed feeds, follow these steps:
- Click the Favorites Center button to display the Favorites pane.
- In the new pane, click the Feeds button.
- Click a specific feed to display the latest posts from that feed in the browser window.
- You can now click a specific feed headline to read the full article or postin
Internet Security with IE7
Also new in Internet Explorer 7 are several security-related features. Compared to previous versions of the browser, IE7 is much more immune to a variety of securityrelated issues.
Protecting Against Phishing Scams
To protect you from phishing scams, IE7 incorporates Microsoft’s Phishing Filter. This filter automatically connects to an online service that contains a huge database of suspicious websites and alerts you if you attempt to go to one of these sites.
If you attempt to click a link to a known phishing site, the Microsoft Phishing Filter blocks access to the site, changes the Address Bar to red, navigates to a neutral page, and displays a warning message. In other words, if the site is fraudulent, IE7 won’t let you go there. In addition, the Phishing Filter helps protect you from sites that might be fake.
If you attempt to click a link to a site that is not on the list of known fraudulent sites but behaves similarly to such sites, the Microsoft Phishing Filter changes the Address Bar to yellow and cautions you of potentially suspicious content. Unless you’re sure the site is good, don’t click through.
Protecting Against Malicious Websites
Another way that IE7 improves security is to run in Protected Mode. This mode prevents malicious websites or programs from modifying system files and settings without your explicit approval, thus protecting you from viruses, spyware, and computer attacks.
You see, hackers often use web browsers to deliver malicious software (called malware) to your system and cause damage to your PC. This is typically done by executing code within a web page that then takes over your browser and accesses critical parts of your system.
To block these web-based attacks, IE7’s Protected Mode isolates suspicious programs from other applications and the operating system, thus preventing any destructive program from taking over your browser and initiating an attack.
Any program or code downloaded from the Internet is isolated in its own browser window, which insulates the Windows operating system from the potentially malicious code.
It’s security that operates completely in the background. You may not be aware that it’s there, but IE7’s Protected Mode operation is always working to keep you safe.
Blocking Pop-up Ads
If you’ve surfed the Web for any time at all, you’ve noticed those annoying pop-up windows that appear when you visit some websites. Not so with Internet Explorer 7, which incorporates a Pop-up Blocker. This feature, which is enabled by default, blocks the automatic opening of unwanted pop-up windows.
When a site tries to open a pop-up window that is blocked by Internet Explorer, a notification appears in the Information Bar of the browser window. If you click the notification, you can choose to temporarily or permanently allow pop-ups from this site. Otherwise, say bye-bye to unwanted pop-ups!

